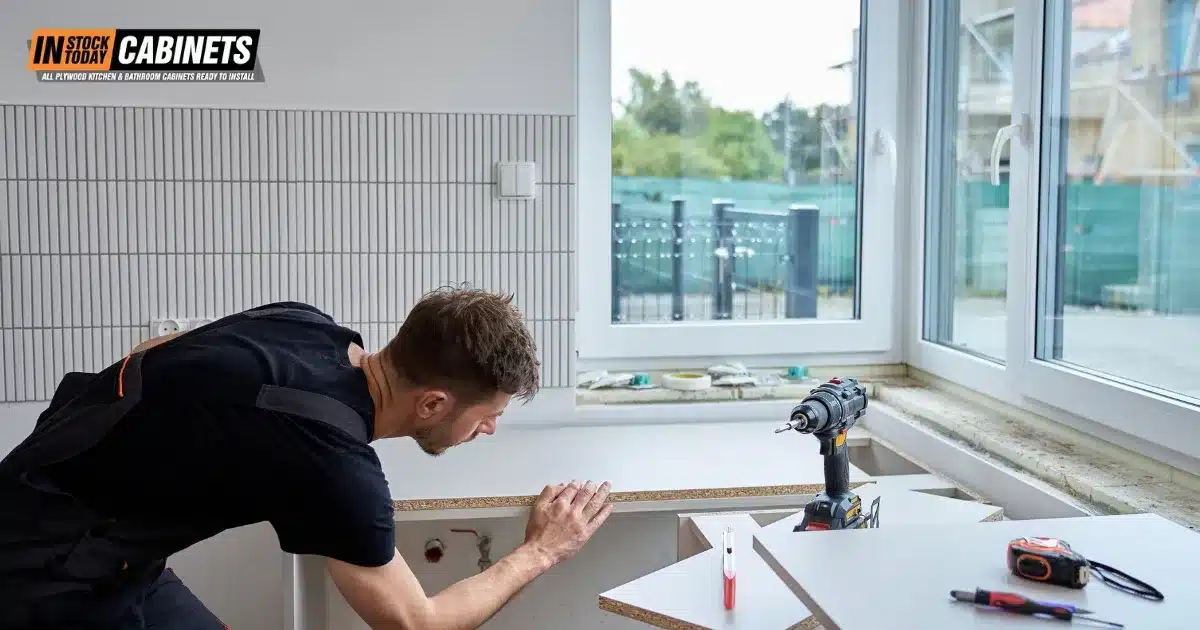
That $8,000 kitchen installation you just completed? A callback tomorrow could cost you $350 in labor and materials—plus damage to your reputation. Thirty percent of professional cabinet installations result in callbacks, with most being completely preventable. For contractors working with Shaker-style cabinets from brands like Fabuwood, the stakes are even higher: the clean lines and minimalist design make any misalignment immediately visible.
Understanding and avoiding the most common professional installation mistakes saves time, protects profit margins, and builds the reputation that generates referrals. This guide identifies the critical errors that cause callbacks and provides proven prevention strategies used by top installers working with In Stock Today Cabinets’ Fabuwood collections.
Key Takeaways for Professional Installers
Foundation and Preparation
✅ Spend 30-45 minutes creating comprehensive wall blueprints—prevents hours of adjustment
✅ Locate floor high point FIRST—start all installations there
✅ Pre-shim wall bows exceeding 3/8″ before hanging cabinets
✅ Document site conditions with photos and measurements
Installation Execution
✅ Install upper cabinets BEFORE base cabinets using ledger boards
✅ Start with corner cabinets, work outward in both directions
✅ Join cabinets loosely, align entire run, then systematically tighten
✅ Use minimum 4 cabinet screws (#10 x 2.5″-3″) per 30″ wall cabinet into studs
✅ Never rely on drywall anchors for structural support
Shaker Cabinet Precision
✅ Maintain consistent 1/8″ door reveals—the style is unforgiving
✅ Mount hardware ONLY on stiles/rails, never on recessed panels
✅ Use jigs/templates for consistent hardware placement
✅ Adjust European hinges in all three axes (lateral, vertical, depth)
✅ Sight down door fronts from angles to verify plane alignment
Quality Assurance
✅ Use composite shims in pairs (narrow-end to narrow-end)
✅ Maintain leveling tolerance under 1/16″ per 12′ for countertops
✅ Remove doors until final installation phase to prevent damage
✅ Test every door and drawer 10+ times under typical load
✅ Verify soft-close mechanisms function properly on all units
Quick Reference: Critical Installation Specifications
| Specification | Professional Standard | Why It Matters |
|---|---|---|
| Wall cabinet mounting | Minimum 4 screws (#10 x 2.5″-3″) into studs | KCMA requires 600 lbs load capacity |
| Door reveals | Consistent 1/8″ between all doors | Shaker style shows any inconsistency |
| Leveling tolerance | Under 1/16″ per 12′ for countertops | Granite fabricators’ requirement |
| Face frame connection | 3 screws per joint with pilot holes | Prevents gaps and misalignment |
| Shimming maximum | 1/2″ thickness per location | AWS standard; prevents stress |
| Corner cabinet clearance | 3-6″ pullback from wall | Required for door swing |
The Business Case for Perfect Installation
| Impact Category | Cost per Callback | Time Investment | Long-term Consequence |
|---|---|---|---|
| Direct callbacks | $180-$350 | 2-3 labor hours | Eroded profit margins |
| Reputation damage | Immeasurable | Lost referrals | Reduced future business |
| Material replacement | $100-$500+ | Rush shipping delays | Project timeline issues |
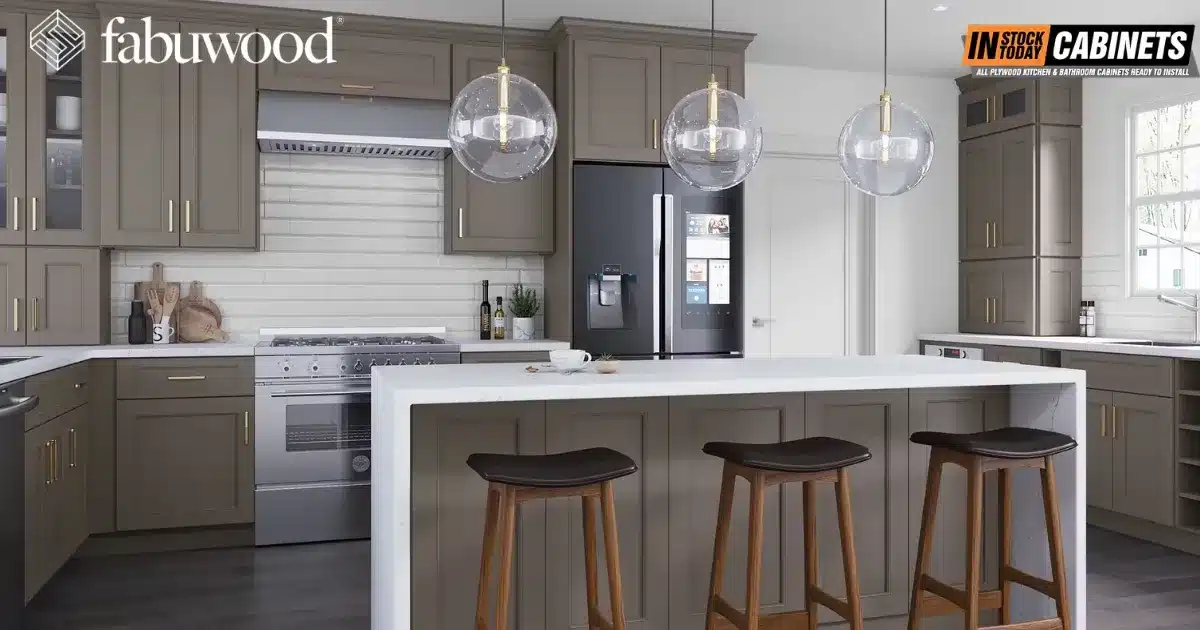
The difference between acceptable and exceptional installations comes down to methodology. For contractors working with premium cabinets like Fabuwood’s Galaxy, Nexus, or Fusion collections, precision protects both your investment and professional reputation.

The 10 Most Critical Installation Mistakes
1. Foundation Failures: Starting Without Proper Site Assessment
The Problem: Approximately 62% of callbacks trace to leveling errors that begin during site preparation. Rushing the “blueprinting” phase by assuming walls are plumb and floors are level creates cascading problems throughout installation.
Prevention Strategy:
Critical Steps:
- Locate the floor’s high point first (never start at a random spot)
- Use 8-foot level laid flat, rock to find pivot points
- Mark highest point—this is your reference for ALL measurements
- Document floor variations with photos and measurements
- Create a wall blueprint before hanging anything
- Use laser level to check walls vertically and horizontally
- Identify wall bows exceeding 3/8″ requiring pre-shimming
- Mark all stud locations with vertical lines
- Document electrical boxes, plumbing, obstacles
Time Investment: 30-45 minutes of blueprint work prevents 3-4 hours of adjustment time later.
Professional Tip: Pre-shim any wall bows over 3/8″ before cabinet installation. Pin or tape shims to create a flat mounting surface, preventing cabinet back stress during mounting.
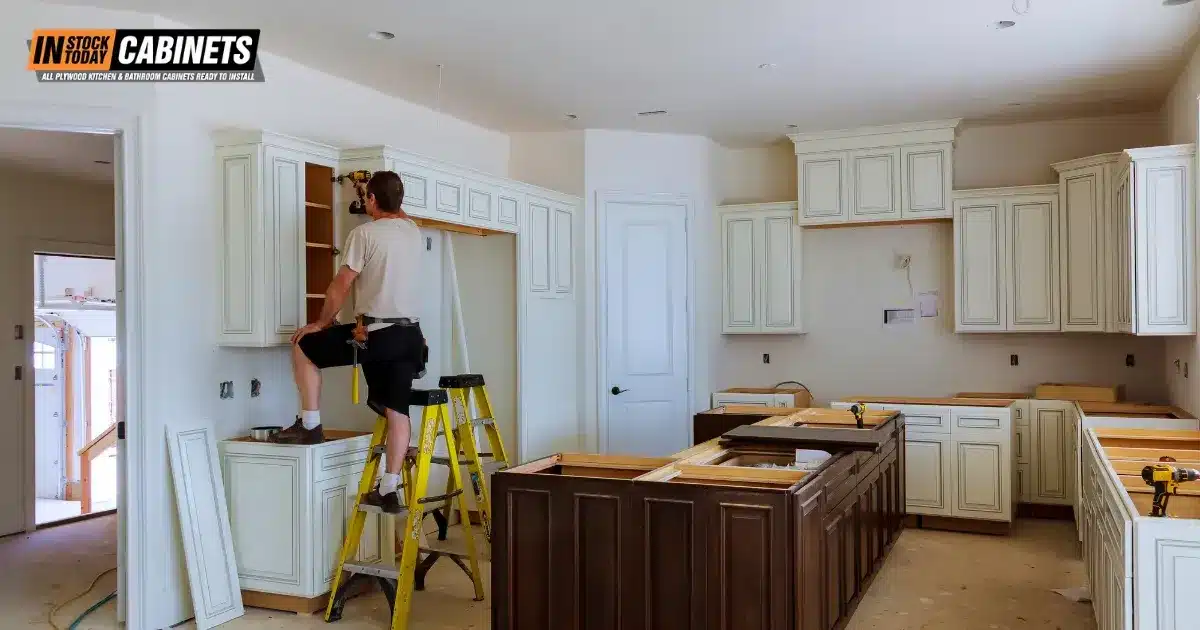
2. Improper Installation Sequencing
The Problem: Defaulting to base-first installation creates unnecessary challenges, increases damage risk, and makes upper cabinet mounting significantly harder.
The Professional Sequence:
| Order | What to Install | Why This Order |
|---|---|---|
| 1st | Upper wall cabinets | Unobstructed access, no base damage risk |
| 2nd | Base cabinets | Easier workflow, stable foundation |
| 3rd | Specialty units (islands) | Built around primary layout |
| 4th | Finishing elements | Final touches on completed structure |
Within Each Type: Always start with corner cabinets, then work outward in both directions. Corner units establish reference points for the entire run.
Critical Rule: Use level ledger boards to support upper cabinets during installation. This 2×4 board screwed temporarily to the wall at the cabinet bottom height transforms a two-person struggle into a controlled, precise process.
3. Wall Attachment Failures
The Problem: Improper cabinet mounting to studs causes 10-15% of professional installation failures and creates serious liability exposure. Upper cabinets pulling away from walls represent life-safety hazards.
KCMA/ANSI Requirements:
- Wall cabinets must support 600 lbs static load for 7 days
- No deflection or joint separation permitted
- Proper installation required to achieve these ratings
Professional Mounting Method:
Stud Location:
- ✅ Use quality electronic stud finder
- ✅ Confirm with pilot holes or finish nails
- ✅ Mark both stud edges, find center
- ✅ Never trust readings without confirmation
- ❌ Never rely on drywall anchors for structural support
Fastener Selection:
| Application | Screw Type | Length | Quantity |
|---|---|---|---|
| Wall cabinets | Cabinet screws (#10) | 2.5″-3″ | Minimum 4 per 30″ cabinet |
| Face frame joining | Cabinet screws (#8) | 2.5″ | 3 per joint (top/middle/bottom) |
| Base attachment | Cabinet screws (#10) | 2.5″-3″ | Into studs or floor blocking |
Why Cabinet Screws Matter:
- Designed for shear stress (drywall screws snap)
- Proper thread pitch for wood
- Washer heads prevent pull-through
- Corrosion resistant for long-term holding
4. Shimming Technique Errors
The Problem: Improper shimming compromises stability and creates alignment problems that persist throughout the cabinet’s life.
Professional Shimming Standards:
DO:
- ✅ Use composite/plastic shims (moisture-resistant, won’t compress)
- ✅ Place narrow-end to narrow-end in pairs (maximum surface contact)
- ✅ Shim at cabinet sides and dividers (not just toe kick centers)
- ✅ Maintain tolerance under 1/16″ per 12′ for countertop prep
- ✅ Pre-shim wall bows before hanging cabinets
DON’T:
- ❌ Use wood shims (compress over time)
- ❌ Exceed 1/2″ thickness at any location (AWS standard)
- ❌ Rely on shimming to fix measurement errors
- ❌ Shim cabinets to follow uneven floors
Critical Principle: Shimming should support and stabilize correctly positioned cabinets, NOT compensate for poor measurement or layout errors.
5. Face Frame Joining Mistakes
The Problem: Improper cabinet joining creates gaps, misalignment, and visible fasteners that undermine professional appearance.
The Professional Process:
Phase 1: Loose Installation
- Position all cabinets with wall screws loosely installed
- Check level on each unit
- Don’t fully tighten anything yet
Phase 2: Cabinet Joining
- Use hand-screw clamps (not C-clamps—they flex)
- Align face frames perfectly flush (no gaps, no steps)
- Drill 1/8″ pilot holes through face frames
- Drive #8 x 2.5″ screws at top, middle, and bottom
- Countersink screw heads slightly
Phase 3: Final Tightening
- Verify entire run alignment
- Check level across multiple cabinets
- Systematically tighten wall screws from corner outward
- Final alignment verification
Cardinal Rule: ALWAYS attach cabinets at face frames, NEVER through side panels (creates visible holes and compromises structural integrity).
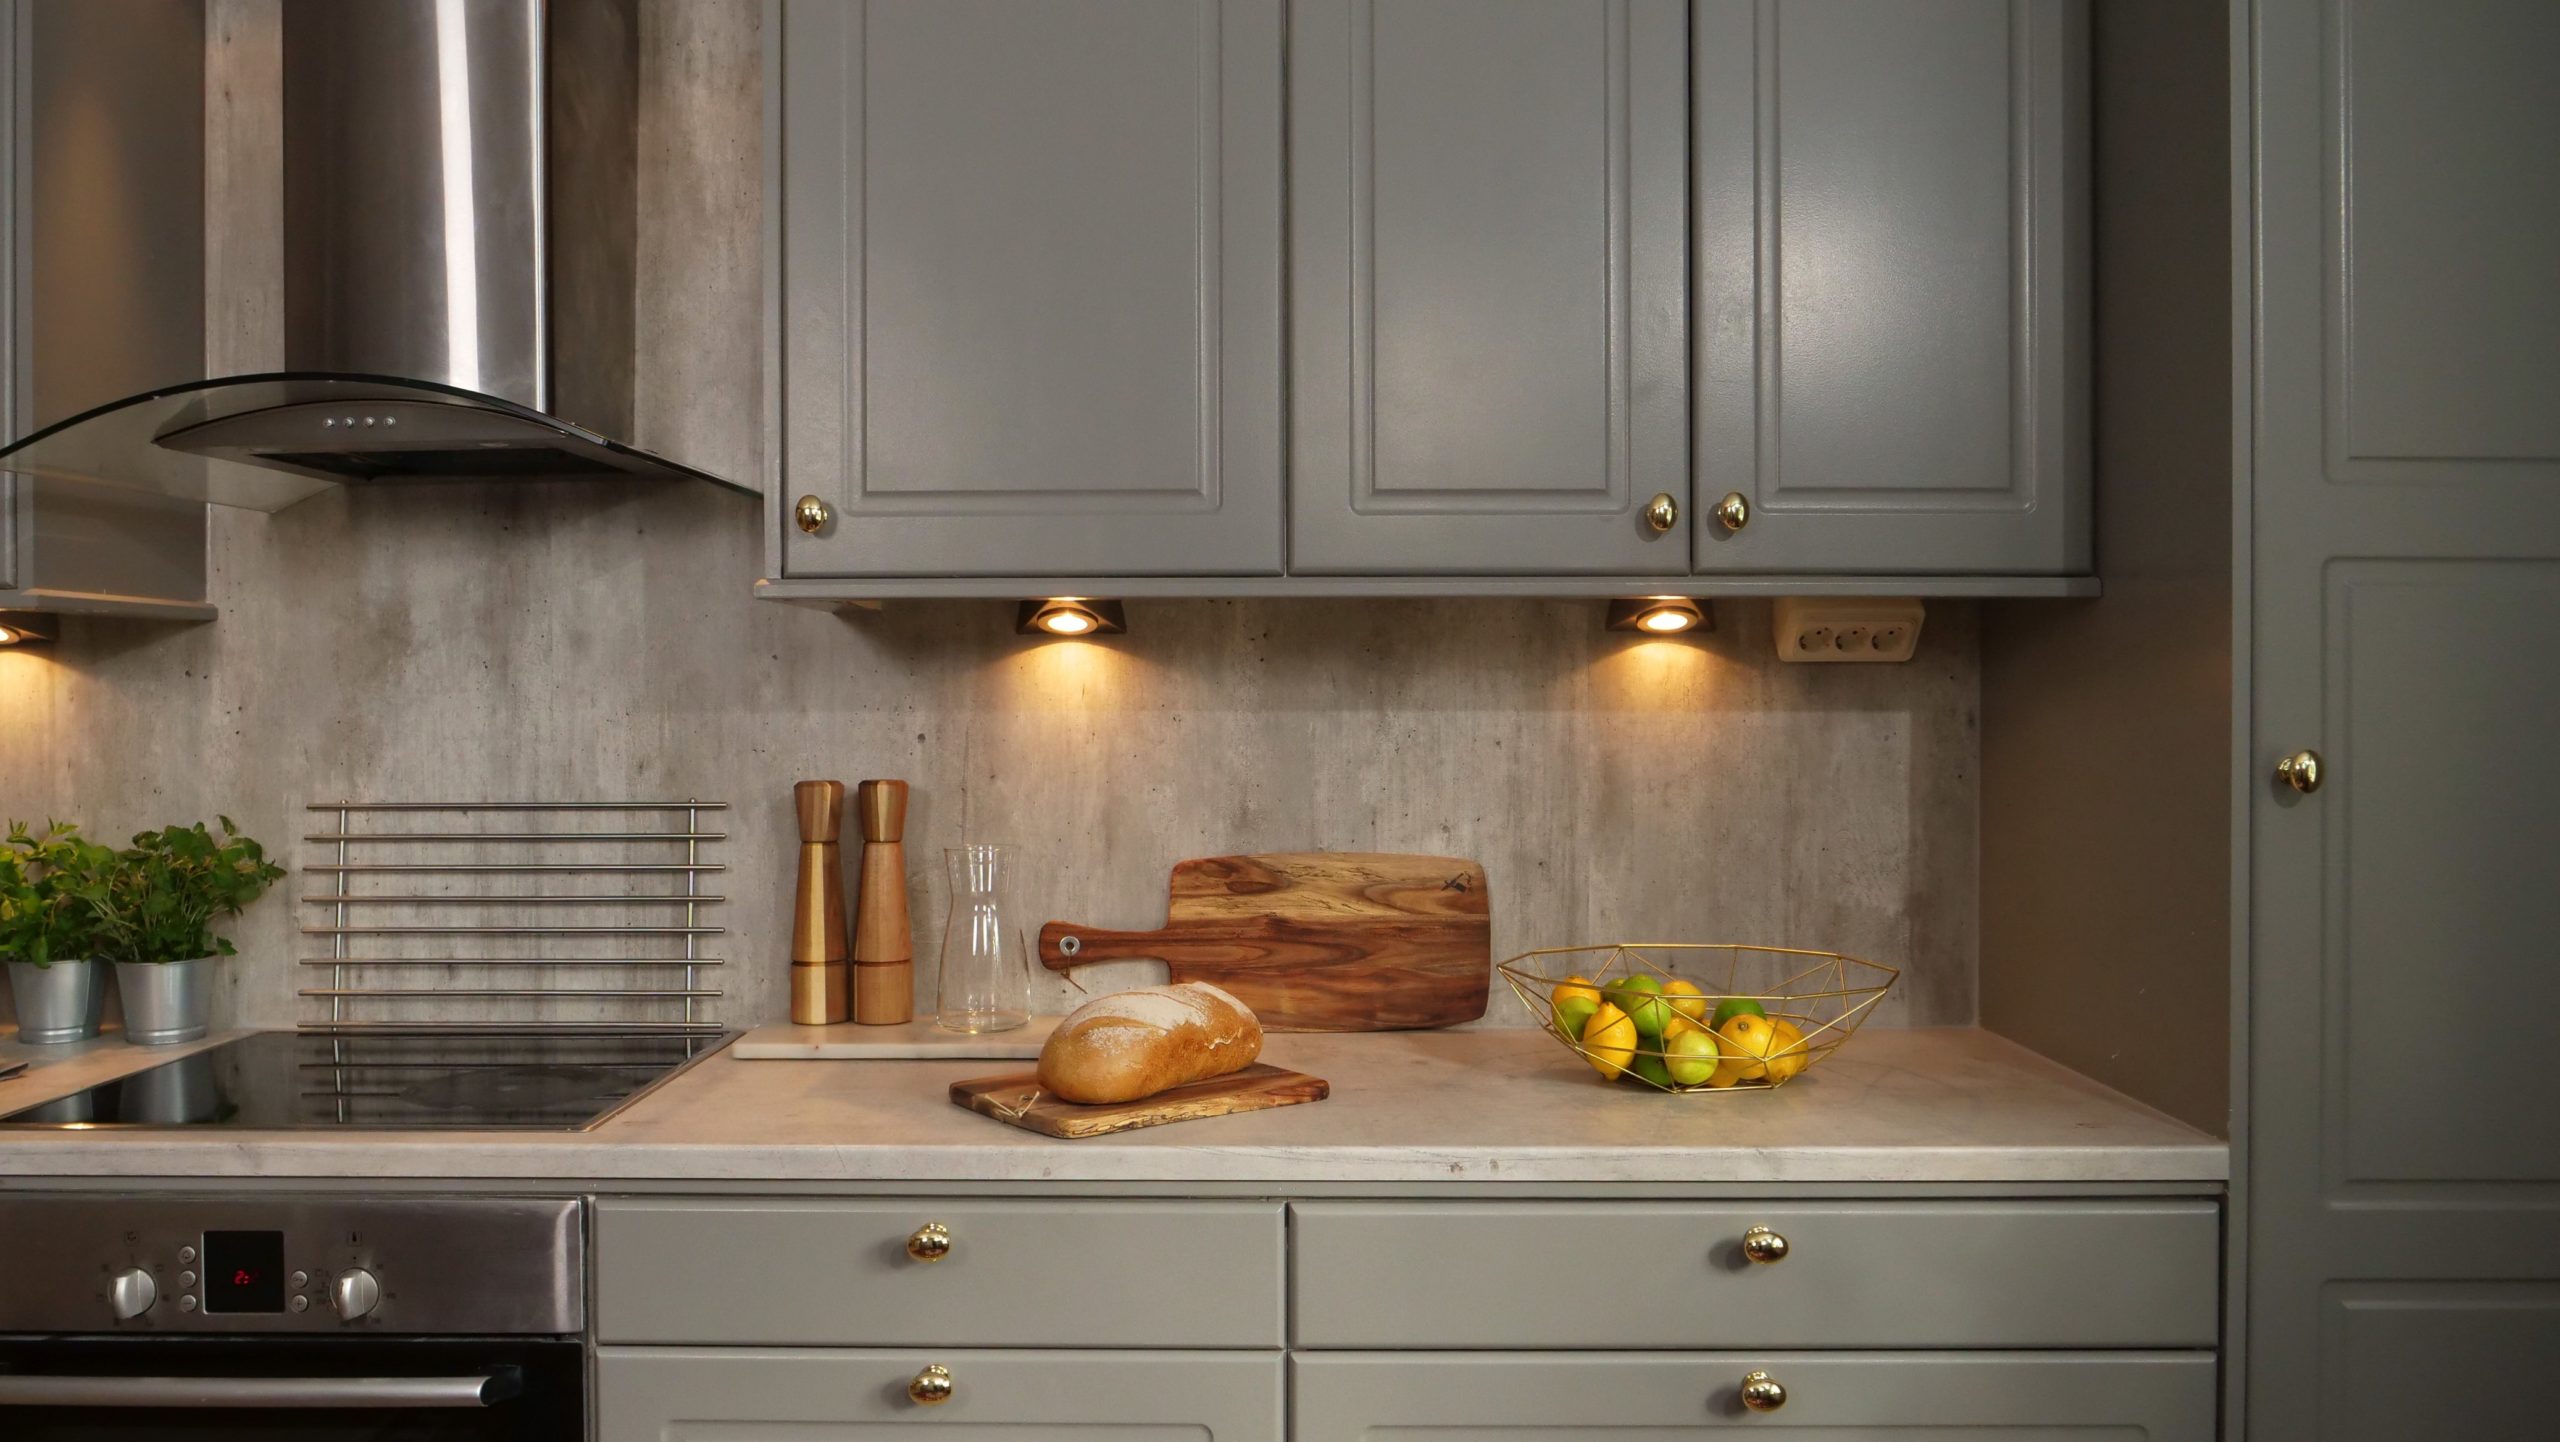
6. Door Reveal Inconsistencies
The Problem: Shaker cabinets’ minimalist design makes any reveal inconsistency immediately visible. The simple, clean lines offer no visual complexity to hide mistakes.
Professional Standards:
| Cabinet Configuration | Reveal Specification | Notes |
|---|---|---|
| Adjacent cabinet doors | 1/8″ gap | Professional standard |
| Double doors (single cabinet) | 1/8″ center gap | Use door bumpers |
| Door to cabinet edge | 7/8″ (3/4″ frame + 3/4″ door) | Standard thickness |
| Door top to ceiling | 3/16″ minimum | Prevents binding from settling |
Reveal Adjustment Process:
- Verify cabinet boxes are square first (check diagonal measurements)
- Check all wall cabinets on same plane
- Ensure face frame joints are tight
- Install doors with properly centered hinges
- Adjust systematically using three-axis hinge adjustment
- Check from angles (straight-on viewing hides misalignment)
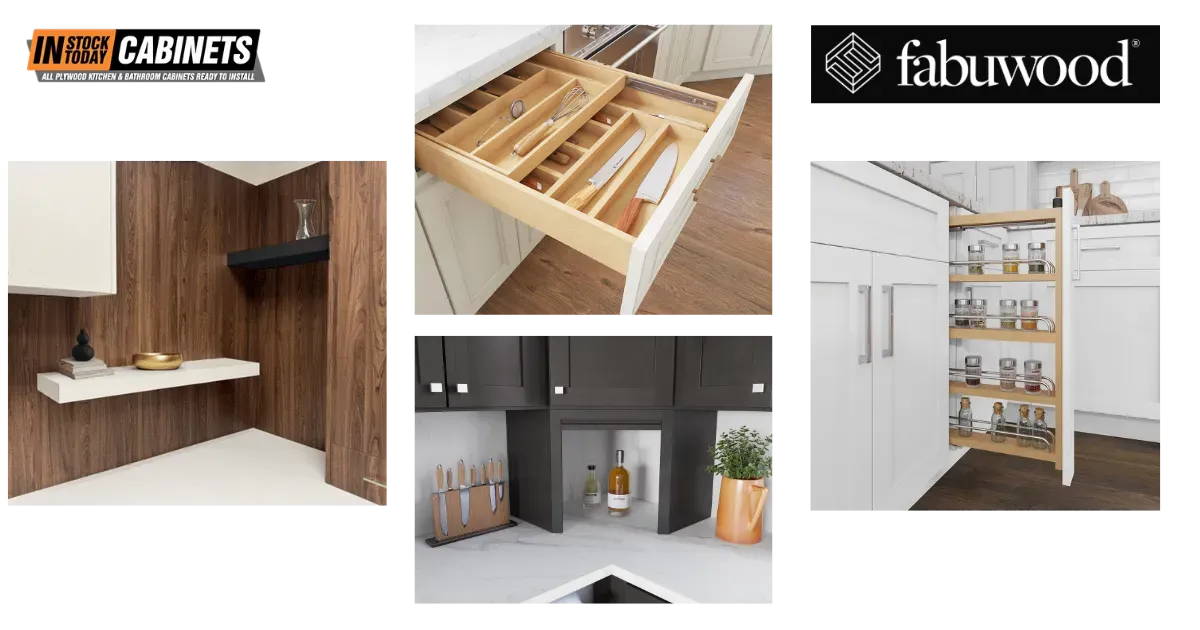
For Fabuwood Cabinets: Full-overlay doors with Blum 6-way adjustable hinges enable precise reveal spacing. The mortise-and-tenon door construction maintains dimensions without warping.
7. Hinge and Hardware Alignment
The Problem: Modern European concealed hinges offer three-axis adjustment, yet many installers only adjust one axis when problems require multi-directional correction.
Three-Axis Adjustment Guide:
| Adjustment | Controls | Screw Location | When to Use |
|---|---|---|---|
| Lateral (side-to-side) | Door position left/right | Front horizontal screw | Uneven side reveals |
| Vertical (up-down) | Door height | Oval mounting holes | Uneven top/bottom reveals |
| Depth (in-out) | Door closure/reveal | Rear horizontal screw | Proud or recessed doors |
Professional Technique:
- Make 1/4 turn adjustments only
- Close door after each adjustment
- Adjust all hinges on door equally
- Check alignment from multiple angles
- Target 1/8″ reveal consistency
Hardware Placement for Shaker Cabinets:
Critical Rule: Hardware MUST mount on stiles or rails, NEVER on recessed center panels.
Standard Placement:
- Upper doors: Lower corner, 2-3″ from edges (opposite hinge side)
- Lower doors: Upper corner, 2-3″ from top (prevents hitting countertop)
- Drawers: Centered on top rail, or two pulls at thirds for wide drawers
Professional Tip: Use hardware jigs or templates for every installation. Misdrilled holes cannot be moved—the only fix is patching (never perfect) or replacing doors/drawer fronts.
8. Corner Cabinet Installation Errors
The Problem: Corner cabinets account for 18% of callbacks due to door clearance issues and improper filler sizing.
Corner Installation Requirements:
| Corner Type | Depth | Wall Pullback | Filler Width | Critical Check |
|---|---|---|---|---|
| Blind base corner | 34″-39″ | 3-6″ | 3″ minimum | Adjacent door clearance |
| Lazy susan base | 33″ | Flush | None typically | Pole perfectly vertical |
| Diagonal wall | Varies | Per specs | Varies | Door opening adequate |
Professional Installation Sequence:
- Position corner cabinet FIRST (before adjacent units)
- Pull 3-6″ from corner wall (blind corners)
- Mount door and test full swing range
- Position adjacent cabinet mockup to verify clearance
- Install properly sized filler strip
- Secure adjacent cabinet against filler
- Final door operation test with all units in place
For Lazy Susans:
- Pole must be perfectly vertical (use post level on all sides)
- Slight lean causes binding and premature wear
- Test rotation before securing base cabinet
- Adjust shims to achieve vertical alignment
9. Finish Protection Negligence
The Problem: Finish damage accounts for 8% of installation issues. Touch-up paint rarely matches perfectly under close inspection, especially on Fabuwood’s UV-cured painted finishes.
Protection Protocol:
During Installation:
| Protection Method | Application | Purpose |
|---|---|---|
| Remove doors/drawers | Before transport and installation | Reduce weight, prevent damage |
| Moving blankets | Cabinet transport | Prevent scratches between units |
| Wood blocks | Between clamps and cabinets | Prevent clamp marks on finish |
| Painter’s tape | Where drilling hardware | Prevent finish chipping |
| Clean work surfaces | Before placing each cabinet | Eliminate scratching debris |
Post-Installation:
- Install slip-on bumpers at protruding corners
- Cover with plastic sheeting during other trades’ work
- Establish “no-touch” zones with clear communication
- Keep doors removed until near project completion
- Zero-tolerance policy for using cabinets as work surfaces
Remember: Touch-ups never match perfectly. Prevention is the ONLY reliable strategy for maintaining pristine finishes.
10. Code Compliance Oversights
The Problem: Professional installations must comply with multiple industry standards affecting safety, structural integrity, and accessibility.
Critical Code Requirements:
KCMA/ANSI A161.1 (Cabinet Standard):
- Wall cabinets: 600 lbs load capacity minimum
- Base cabinets: 250 lbs (with rails) or 200 lbs (without)
- Proper installation required to achieve ratings
IRC (International Residential Code):
| Requirement | Minimum | Notes |
|---|---|---|
| Kitchen walkway | 36″ between opposing cabinets | 42″ recommended (NKBA) |
| Cooking surface clearance | 30″ to unprotected combustible | 24″ with protected non-combustible |
| Range hood CFM | 100 CFM minimum ducted | Must vent to exterior |
Appliance Clearances:
- Dishwasher: 24″ width, 3-5mm side clearance, 6-10mm top clearance
- Refrigerator: 6-12mm side clearance, 25-50mm top clearance per manufacturer
- Range/Cooktop: Follow manufacturer cutout template EXACTLY
Professional Responsibility:
- Verify permit requirements before starting
- Schedule inspections at appropriate milestones
- Document all certifications (CARB 2, TSCA VI compliance)
- Provide documentation to customer

Why Choose Fabuwood Cabinets Through In Stock Today
Professional-Grade Quality Meets Installation Efficiency
When working with Fabuwood’s Shaker collections available through In Stock Today Cabinets, professional installers benefit from:
Construction Advantages:
- All-plywood construction (no particleboard) for superior durability and stability
- Mortise-and-tenon door frames maintain precise dimensions without warping
- Blum soft-close hardware standard (one-click Compact Clip hinges on Allure series)
- Full-extension drawer glides with integrated soft-close (Blumotion technology)
- KCMA certified to meet 600 lb load requirements when properly installed
Installation-Friendly Features:
- Consistent manufacturing tolerances make professional installation more predictable
- Pre-drilled mounting holes at standard locations simplify wall attachment
- EZ-level drawer fronts (select models) speed alignment process
- Reinforced mounting rails provide superior holding power with proper fastening
Quality Certifications:
- Q12 Quality Standards verified (12 attributes defining superior cabinets)
- CARB 2 and TSCA VI compliant (formaldehyde emissions)
- Limited lifetime warranty protects your installation investment
Shaker Collections for Every Project:
| Collection | Style | Best For | Key Features |
|---|---|---|---|
| Galaxy | Contemporary | Modern aesthetics, painted shakers | 7 colors including Frost and Linen |
| Nexus | Transitional | Classic shaker versatility | Multiple wood stain options |
| Fusion | Wide-frame shaker | Bold, modern interpretation | Contemporary design emphasis |
| Allure | Traditional | Premium installations | Dovetail drawers, Blum Compact Clip |
Professional Support and Immediate Availability
The IST Cabinets Advantage for Trade Professionals:
Same-Day Availability
✅ Six warehouse locations (Alexandria VA, Chantilly VA, Baltimore MD, Beltsville MD, Houston TX, and more)
✅ Same-day pickup available at all locations
✅ 5-7 business day delivery for kitchen cabinets
✅ No 8-12 week wait times that delay projects and tie up capital
Dealer Program Benefits
✅ Volume pricing that protects profit margins
✅ Dedicated account representatives for personalized service
✅ Priority ordering and fulfillment keeps projects on schedule
✅ Marketing support materials help promote your business
✅ Technical training available for installation best practices
Design and Technical Support
✅ Free consultation for project planning and layouts
✅ Fast quotes (same-day turnaround)
✅ Technical support during installation (real professionals who understand trade needs)
✅ Space planning assistance optimizes cabinet selection and placement

Additional Professional Solutions
Fibo Kitchen Boards: Profitable Backsplash Upsell
Waterproof wall panels designed for the splash zone between countertops and upper cabinets
Why Professional Installers Choose Fibo:
| Factor | Traditional Tile | Fibo Kitchen Boards | Advantage |
|---|---|---|---|
| Installation time | 2–3 days | Afternoon | Fibo (6–8x faster) |
| Labor skill required | Tile setter | Carpenter | Fibo (your crews) |
| Profit margin | Lower (more labor) | Higher (less labor) | Fibo (better margins) |
| Client use | Wait for cure | Immediate | Fibo (satisfaction) |
Installation Features:
- Patented Aqualock click-together system installs directly over drywall
- No substrate preparation required (no backer board, no waterproof membrane)
- 18″ height panels perfect for backsplash zone
- Limited lifetime warranty backed by manufacturer
- Easy maintenance (no grout lines to clean or maintain)
Upsell Strategy:
- Present during cabinet selection (show coordination with Fabuwood finishes)
- Bundle pricing with cabinet installation (higher overall margin)
- Same-day installation possible (cabinets AM, backsplash PM)
- Professional differentiation (not all contractors offer this option)
Transform Your Next Installation
Ready to streamline cabinet installation with quality products that arrive ready to install?
Professional installers throughout DC, VA, MD, and beyond trust In Stock Today Cabinets for:
✅ Immediate inventory access (no supply chain delays)
✅ Consistent quality (reduces callbacks and protects reputation)
✅ Professional support (from design through final inspection)
✅ Competitive volume pricing (protects profit margins on every job)
✅ Complete solutions (cabinets, backsplash, accessories, support)
Shaker Cabinet Installation FAQs for Professional Contractors
What are the most common pitfalls when installing shaker-style cabinets, and how can I avoid them?
Common pitfalls when installing shaker style kitchen cabinets and how to avoid them
Thirty percent of professional cabinet installations result in callbacks, with most being completely preventable. The most critical pitfalls include foundation failures (62% of callbacks trace to leveling errors), improper shimming, and installation sequencing mistakes.
Prevention strategies:
– Spend 30-45 minutes creating comprehensive wall blueprints before hanging anything
– Locate the floor’s high point FIRST and use it as your reference for all measurements
– Pre-shim wall bows exceeding 3/8″ before cabinet installation
– Use composite/plastic shims in pairs (narrow-end to narrow-end) rather than single wood shims
– Follow the professional installation sequence: upper cabinets first, then base cabinets, then specialty units
– Use level ledger boards to support upper cabinets during installation—this transforms a two-person struggle into a controlled, precise process
The clean lines and minimalist design of Shaker-style cabinets make any misalignment immediately visible, so attention to detail during preparation and execution is non-negotiable for protecting your reputation and profit margins.
What is the correct installation sequence for professional cabinet installation?
Professional checklist for a flawless shaker cabinet installation
Installation order matters significantly. The professional sequence is:
| Order | What to Install | Why This Order |
|---|---|---|
| 1st | Upper wall cabinets | Unobstructed access, no base damage risk |
| 2nd | Base cabinets | Easier workflow, stable foundation |
| 3rd | Specialty units (islands) | Built around primary layout |
| 4th | Finishing elements | Final touches on completed structure |
Critical sub-steps within each installation type:
– Always start with corner cabinets, then work outward in both directions
– Use hand-screw clamps (not C-clamps) to join face frames perfectly flush
– Keep all wall screws loosely installed until the entire run is aligned
– Systematically tighten wall screws from corner outward only after full alignment verification
– Remove doors and drawers from all units before transport and installation to reduce weight and prevent damage
This sequencing prevents cascading alignment problems and significantly reduces installation time while improving final quality.
What are the most overlooked steps when installing shaker cabinets that lead to future problems?
Contractors often overlook the critical foundation phase, assuming walls are plumb and floors are level without verification. These “unknown unknowns” create problems that compound throughout the installation:
Frequently overlooked steps:
– Using electronic stud finders without confirmation—never trust readings without pilot holes or finish nails
– Failing to use quality cabinet screws (#10 x 2.5″-3″) with a minimum of 4 per 30″ wall cabinet
– Relying on drywall anchors for structural support instead of proper stud mounting (KCMA requires 600 lbs load capacity)
– Skipping three-axis hinge adjustments—European concealed hinges require lateral, vertical, AND depth adjustments for proper reveal consistency
– Removing protective doors after installation rather than before, exposing the finish to damage during other trades’ work
– Failing to verify code compliance before starting (IRC walkway requirements, clearances, range hood CFM ratings)
The difference between acceptable and exceptional installations comes down to these methodological details. Professional installers verify every assumption rather than making them.
How to properly measure and plan for shaker cabinet installation**
Proper planning prevents most installation failures. The blueprint phase is your most critical investment:
Step-by-step planning process:
1. Locate the floor’s high point using an 8-foot level laid flat; rock it to find pivot points
2. Mark the highest point—this is your reference for ALL measurements
3. Document floor variations with photos and measurements for the entire project
4. Create a wall blueprint before hanging anything:
– Use laser level to check walls vertically and horizontally
– Identify wall bows exceeding 3/8″ requiring pre-shimming
– Mark all stud locations with vertical lines
– Document electrical boxes, plumbing, obstacles, and spacing
5. Verify corner clearances (blind corners require 3-6″ pullback from wall)
6. Check appliance cutout templates and verify exact measurements with manufacturers
7. Verify code requirements including IRC kitchen walkway (36″ minimum, 42″ recommended), cooking surface clearance, and range hood specifications
Time investment: 30-45 minutes of planning prevents 3-4 hours of adjustment time later.
This comprehensive blueprint becomes your roadmap, preventing measurement errors that cascade into alignment problems throughout the installation.
What wall attachment method and fastener specifications ensure professional-grade installation?
Wall attachment failures cause 10-15% of professional installation failures and create serious liability exposure. Proper fastening is non-negotiable.
KCMA/ANSI Requirements:
– Wall cabinets must support 600 lbs static load for 7 days
– No deflection or joint separation permitted
– Proper installation required to achieve these ratings
Professional fastening specifications:
| Application | Screw Type | Length | Quantity |
|---|---|---|---|
| Wall cabinets | Cabinet screws (#10) | 2.5″-3″ | Minimum 4 per 30″ cabinet |
| Face frame joining | Cabinet screws (#8) | 2.5″ | 3 per joint (top/middle/bottom) |
| Base attachment | Cabinet screws (#10) | 2.5″-3″ | Into studs or floor blocking |
Critical fastener selection principles:
– Cabinet screws are designed for shear stress (drywall screws snap under load)
– Proper thread pitch for secure hold in wood
– Washer heads prevent pull-through on cabinet surfaces
– Corrosion-resistant coating for long-term holding power
Stud location verification:
– Use quality electronic stud finder as initial tool
– Confirm with pilot holes or finish nails before committing to fastening
– Mark both stud edges and find center for precise screw placement
– NEVER rely on drywall anchors for structural support
How to adjust shaker cabinet doors and hinges for perfect alignment?
Shaker cabinets’ minimalist design makes any alignment inconsistency immediately visible. Perfect alignment is the hallmark of professional work and requires systematic adjustment using all three adjustment axes.
Professional door reveal standards:
| Configuration | Reveal Specification | Notes |
|---|---|---|
| Adjacent cabinet doors | 1/8″ gap (consistent) | Professional standard — Shaker style shows any inconsistency |
| Double doors (single cabinet) | 1/8″ center gap | Use door bumpers for consistent spacing |
| Door to cabinet edge | 7/8″ (3/4″ frame + 3/4″ door) | Standard thickness specification |
| Door top to ceiling | 3/16″ minimum | Prevents binding from settling |
Three-axis hinge adjustment guide for European concealed hinges:
| Adjustment Type | Controls | Screw Location | When to Use |
|---|---|---|---|
| Lateral (side-to-side) | Door position left/right | Front horizontal screw | Uneven side reveals |
| Vertical (up-down) | Door height | Oval mounting holes | Uneven top/bottom reveals |
| Depth (in-out) | Door closure/reveal | Rear horizontal screw | Proud or recessed doors |
Professional alignment technique:
– Make 1/4 turn adjustments only—avoid over-correcting
– Close door after each adjustment to verify change
– Adjust all hinges on the same door equally
– Check alignment from multiple angles (straight-on viewing hides misalignment)
– Target 1/8″ reveal consistency across all doors
Hardware placement critical rules for Shaker cabinets:
– Hardware MUST mount on stiles or rails, NEVER on recessed center panels
– Upper doors: Place lower corner pulls 2-3″ from edges (opposite hinge side)
– Lower doors: Place upper corner pulls 2-3″ from top (prevents hitting countertop)
– Drawers: Center on top rail, or place two pulls at thirds for wide drawers
– Use hardware jigs or templates for every installation—misdrilled holes cannot be moved
Final quality assurance:
– Test every door and drawer 10+ times under typical load
– Verify soft-close mechanisms function properly on all units
– Sight down door fronts from angles to verify plane alignment
– Maintain leveling tolerance under 1/16″ per 12′ for countertops (granite fabricators’ requirement)

Ready to Experience Fabuwood Quality? Visit IST Cabinets at One of Our Five Showroom Locations
Transform your kitchen or bathroom vision into reality with expert guidance from IST Cabinets, your authorized Fabuwood dealer serving the Mid-Atlantic and Southern regions. With five strategically located showrooms, we bring premium-quality cabinetry solutions closer to contractors, builders, dealers, and homeowners throughout Virginia, Maryland, Texas, and Delaware.
Why Choose IST Cabinets for Your Fabuwood Project?
Authorized Fabuwood Dealer Status: As an authorized partner, we provide direct access to Fabuwood’s complete product lines—Galaxy, Fusion, Luna, Imperio, Nexus, and the newly launched 2025 Designer Collection featuring Forest Green, Cabernet Red, Mint Green, Orchid Purple, and Macadamia Beige.
Expert Design Consultation Services: Our professional designers provide complimentary in-store consultations utilizing advanced visualization technology, helping you see your finished kitchen before making final decisions. Whether you’re a homeowner planning your dream renovation or a contractor managing multiple projects, we deliver personalized solutions tailored to your specific requirements.
Comprehensive Quality Support: Every Fabuwood cabinet we sell carries Q12 Quality Certification, KCMA certification for structural performance, AWI Premium Grade qualification, CARB2 compliance for formaldehyde emission standards, and Limited Lifetime Warranty coverage on construction and materials.
Complete Project Support: Beyond product sales, IST Cabinets provides professional installation coordination, delivery options customized to your project timeline, warranty support through established dealer relationships, and ongoing maintenance guidance to protect your cabinet investment for decades.
Competitive Pricing and Transparency: We serve contractors, dealers, and builders with wholesale pricing while also welcoming homeowners seeking direct access to quality cabinetry without premium markups. Our transparent pricing structure ensures you receive maximum value for your cabinet investment.

Come and Visit Our Showrooms
Our professional designers will assist you at any of our convenient locations throughout VA, MD, TX, and DE:
Alexandria, VA – Flagship Showroom
📍 5731 General Washington Dr, Alexandria, VA 22312
☎️ Phone: (703) 259-9030
📧 Email: info@istcabinets.com
⏰ Hours: Monday-Friday 8:00 AM – 6:00 PM | Saturday 10:00 AM – 2:00 PM
Our flagship Alexandria location features the most extensive Fabuwood display in the region, showcasing the complete Designer Collection with all five bold new color options. This premier showroom serves as the authorized Fabuwood hub for the Washington DC metro area, providing contractors and homeowners immediate access to physical samples, construction demonstrations, and expert guidance. Explore over 50 door style options across all Fabuwood collections—touch, compare, and evaluate quality firsthand.
Fairfax, VA
📍 2817 Dorr Ave Unit B, Fairfax, VA 22031
☎️ Phone: (703) 972-4030
📧 Email: info@istcabinets.com
⏰ Hours: Monday-Friday 8:00 AM – 6:00 PM | Saturday-Sunday Closed
Conveniently located in Fairfax, this showroom serves Northern Virginia’s thriving construction and remodeling community with comprehensive Fabuwood inventory and personalized design services. The Fairfax location specializes in contractor support, offering bulk ordering capabilities and project coordination for builders managing multiple properties simultaneously.
Columbia, MD
📍 9315 Snowden River Pkwy Suite E, Columbia, MD 21046
☎️ Phone: Contact main office for Maryland inquiries
📧 Email: info@istcabinets.com
⏰ Hours: Monday-Friday 9:00 AM – 5:00 PM
Our Columbia location serves Maryland contractors, builders, and homeowners with full Fabuwood product line access and professional design consultation. Strategically positioned between Baltimore and Washington DC, this showroom provides convenient access for projects throughout the Baltimore-Washington corridor.
Houston, TX
📍 4660 Pine Timbers St, STE 110, Houston, TX 77041
☎️ Phone: (346) 295-9555
📧 Email: houston@istcabinets.com
⏰ Hours: Monday-Friday 8:00 AM – 5:00 PM
Extending our Mid-Atlantic success to Texas, the Houston showroom brings Fabuwood’s quality construction and expert design services to Southern contractors and builders. This location maintains substantial inventory supporting large-scale commercial projects and residential developments throughout the Houston metropolitan area.
Delaware, DE
📍 835 Pulaski Hwy, Bear, DE 19701
☎️ Phone: (302) 321-1771
📧 Email: info@istcabinets.com
⏰ Hours: Monday-Friday 9:00 AM – 5:00 PM | Saturday 10:00 AM – 2:00 PM
Serving Delaware’s construction community, our Bear location provides easy access to Fabuwood cabinetry for projects throughout the state. This showroom offers the same comprehensive design services, quality products, and expert consultation available at all IST Cabinets locations.
Build Your Reputation on Quality
Professional cabinet installation separates good contractors from great ones. The methodology outlined in this guide—combined with quality products from Fabuwood and reliable supply from In Stock Today Cabinets—creates the foundation for exceptional installations that generate referrals and build lasting reputations.
Your clients invest significantly in their cabinet projects. They deserve:
- Installation that meets industry standards and codes
- Products backed by certifications and warranties
- Craftsmanship showcasing both quality materials and skilled installation
- A partnership approach from design through final walk-through
You deserve a supplier partner who:
- Maintains real inventory for immediate availability
- Provides consistent quality that reduces callbacks
- Offers professional support and technical assistance
- Protects profit margins with competitive pricing
- Values your business and treats you as a partner
Experience the difference that true cabinet partnership delivers. Visit istcabinets.com or contact your nearest location today.
For more information about Fabuwood cabinet specifications, installation guidelines, warranty coverage, or to schedule a showroom visit, contact In Stock Today Cabinets. Our team of cabinet professionals is ready to support your next project with expertise, inventory, and the partnership approach that professional installers deserve.